Showing posts with label Fabric Paint. Show all posts

Saturday, 4 January 2014


So last weekend I managed to venture beyond the kitchen and get started on a little project I had been putting off for a while. The good old pin board! 

Being a visual person I work best when I can physically see things right before me and this is particularly the case when it comes to calendars and appointments. Sure the diaries on my phone, laptop etc. are great, but I really wanted a place when I could have all my upcoming appointments, invitations and other bits and bobs in one place and constantly staring me in the face (a must if you're fighting your natural urges to procrastinate like me!). 

Hence the pin board. It now takes pride of place in my room when I can see it every day... now I just need a pretty 2014 calendar to stick in its centre!


I think all up this project cost something like $15, and that's only because I wanted a pretty printed fabric! You could have used any old scrap material and finish it for even cheaper! It also only took one lazy afternoon to complete. Perfect! 


Here's How It's Done


All you need for this project is:


An old picture frame  (it's not shown in the above picture but you need both the frame and its backing board!) 

Some sandpaper 

Paint in whatever colour you want the frame to be! 

Staple gun (not essential) 

Craft glue
Wadding or sheet foam at least 1cm thick 

Roll of cork 

Pretty fabric


My bedroom  has what I like to think of as a "Modern Gothic sheik" vibe about it (lots of black, silver and damask!) so I chose the colour and fabric of my board to tie in with this look. That and the fabric I found had keys on it and I have a bit of a thing for keys... nothing weird here... 


Start off by lightly sanding back the old frame and giving it a coat or two of paint. I chose a glossy black!


While you're setting that aside to dry, grab the backing of the picture frame and place it facing down. Now grab your roll of cork and measure it to cover the backing board. Cut it to size and then stick it to the board with your craft glue.


Follow the cork with the wadding/foam. Measure and cut the foam to the dimensions on the board and use some more craft glue to stick it on top of the cork layer.

Next, give your fabric a quick iron to get rid of any wrinkles and then lay on a bench facing downwards (so the side you want to be showing on the finished board is facing away from you. Trim the fabric so that you have 3-4 cm overhang on all sides when you place the board on top 


UNLIKE IN THE ABOVE PICTURE, place the now padded backing board in the centre of the fabric with the foam side facing down onto the fabric. Grab your staple gun and, keeping the fabric pulled tight so you don't get wrinkles, fold over the overhang and staple to the back of the board.


That's about it! Now simply grab your painted frame and stick the backing in (it may be a bit snug due to the fabric but just put a little muscle into it!).


You can leave it as is but for mine I thought it just needed a little extra 'somethin somethin' so I grabbed some simple gold thumb tacks and spaced them all around the outside of the board to create a bit of a studded effect.


And you're done!

Stick your board wherever you need constant reminders, inspiration or simply have lots of notes in need of refuge!






Monday, 14 January 2013

Cushions 101: The Beginners Guide!


For my 21st birthday my grandparents bought me a pretty, shiny and rather wonderful sewing machine, no doubt hoping I will use it to make dresses and outfits for a hoard of future grandchildren (my family is nothing if not practical... but don't your breath for those grand kids Nanna!).

Since then it has remained tucked snug in its box, only venturing out when I decided to experiment with its different settings, pre-programmed stitch styles etc. by making a couple of wheat bags... I must really get around to finishing them!

However, in the spirit of beautify-ing my Mum's spare bedroom I decided to whip out my machine and attempt to make some cushions for the bed... and I have to say I'm pretty pleased with how they turned out!


As far as sewing goes - I have no real clue what I am doing! This is why this project is so perfect for beginners. All it requires is sewing a couple of straight lines, and if your going for a more rugged look you can even be forgiven for being a bit wonky!

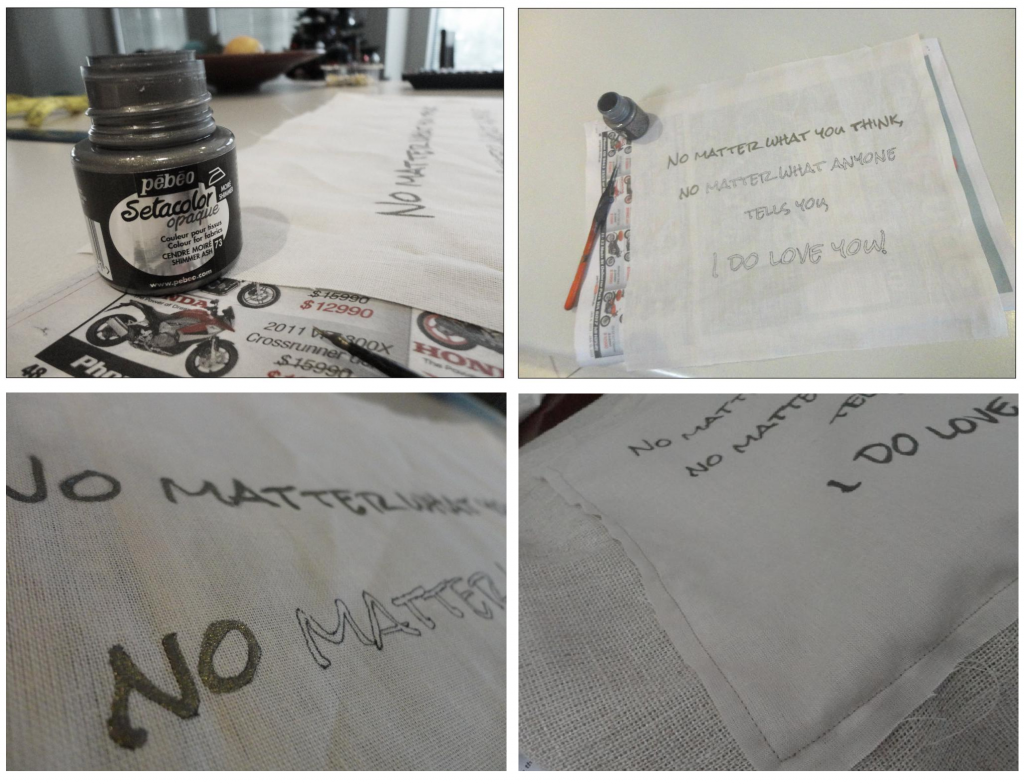
I decided to decorate my cushions by painting them with fabric paint (you can find these in a variety of colours at most art and craft stores) which is really fun stuff because you can put your own designs on clothes, curtains, sheets, cushions etc. and it wont come off in the wash! Ohhhh the possibilities!

Since I love adding personal touches to everything I make for these cushions I decided to adorn them with two specific quotes - one from a show my Mum and I religiously watch together as our own corny little version of 'us time' and another which is from my favourite actress and always makes me feel a little better when I'm feeling stressed or upset! Hopefully they have the same effect on whoever is sleeping with them! Either way, I think little personal touches like these really make a project that little bit more special ....


For this simple square cushion you will need:


  • Fabric of your choice
  • Scissors
  • Sewing Machine
  • Sewing thread (for the machine)
  • Stuffing
  • Fabric Paint *optional*


Step 1.  Prepare Your Fabric


Start by choosing the fabric you want to use and the size you want your cushion to be and then cut the fabric so that it twice as long as it is wide (this will allow you to fold it over and save sewing a fourth side).

Make sure you cut the fabric a couple of centimetres larger than the desired final size so you have room for sewing and to allow for eventual stuffing! Soooo if you wanted your cushions to be 30cm x 30cm you would cut the fabric approx 33cm x 66cm.


Step 2. *Optional Decorations*


If you want to decorate your cushions as I did it is very simple-but effective!

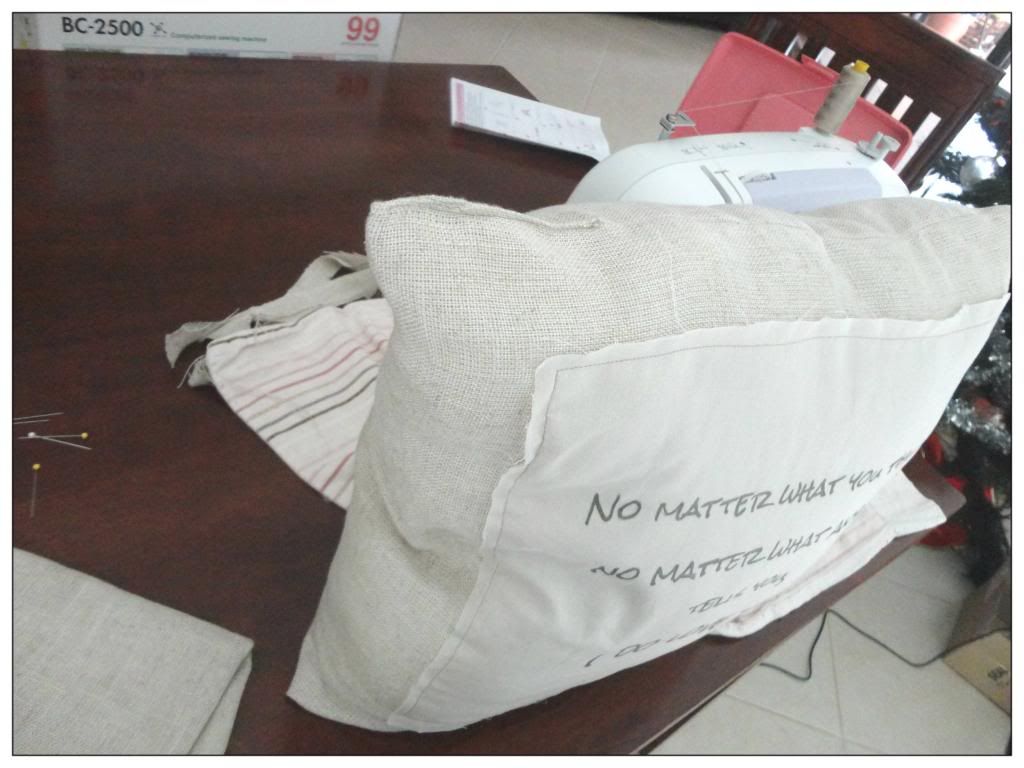
I simply chose a piece of fabric which complimented the tone of my primary material and cut it into a square slightly smaller than the face of the cushion - then it was time to get busy with the fabric paints!


I found a font I liked on my computer and printed off my wording then used a pencil to trace the lettering onto my fabric. After that it was a simple matter of painting over the words in my fabric paint (and adding a pretty feather to one cushion... just because I like feathers!)

Let the paint dry fully and follow the makers instructions on how to set it so that it is wash proof (most simply requiring a couple of minutes of ironing) and then sew the fabric onto the cushion material which will eventually be the front of the cushion.


 BAM! Instant cute-ification!


  Step 3. Sew Time!


Pretty self-explanatory... a cushion is just a plain piece of fabric until you add some stitching!

With sewing machines these days the sewing is really the easy part - simply make sure your machine is threaded and lay your fabric out so that the front of the cushion is facing upwards.

Fold over the top long side so that you have your square shape (at this stage if the sides were all stitched together the cushion would be inside out).

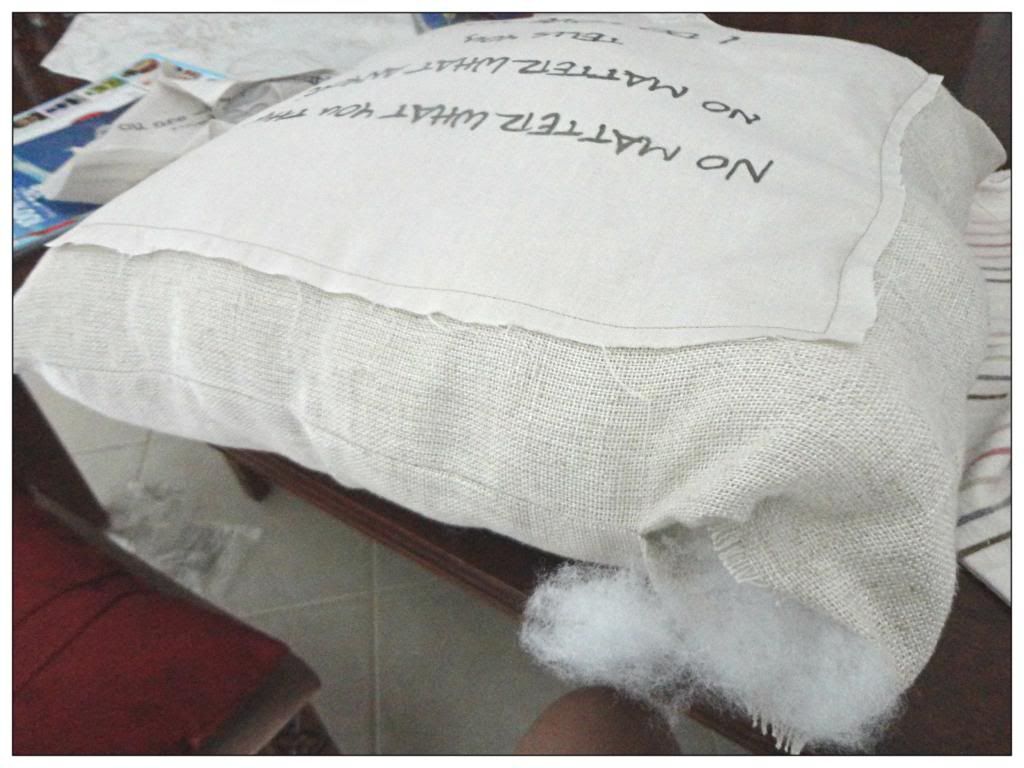
Making sure your sides are aligned, sew two of the edges completely and on the third and final edge stop about 10cm from the end and invert the case using that hole.


Step 3. Stuff It


No, I'm not being rude, I mean this quite literally.

Take some craft stuffing and fill your cushion to the desired density, making sure to push the stuffing right into the corners fluffing it as you go to make sure it is evenly filled without lumps.


Then its a simply matter of using your sewing machine to stitch up that ~10cm hole and Voila!


After a few simple steps you are left with some pretty darn fabulous cushions to brighten up any room!


Sunday, 30 December 2012

Re-Vamp That Lamp!


Feeling very Dr. Suess-ish with this title
I do love things that rhyme
But not as much as a cheap, old lamp
I can renovate in no time!


While I await my Pulitzer prize no doubt heading my way in the mail after that little ditty ('ditty'? I feel like a pirate, or some sort or medieval idiot carrying a lute...), let me fill you in on the latest addition to my bedroom - the revamped lamp!

Like countless other projects, I was prowling through Pintrest when I was inspired by the variety of beautiful and unique lighting options I could utilise in my bedroom which would follow its general theme (see my earlier wall hanging addition here ). I had an image in my mind about the kind of table lamp I was after but having spent hours looking online and in store I was still yet to find anything which came close to that ideal. The solution? DIY of course!    

I spend quite a while looking through the various tutorial other bloggers have written regarding recovering old lamps (and believe me, there are LOTS!) and it all seemed pretty straightforward. So, several trips to spotlight and a dash to Target during my lunch break later, I was ready to get cracking on my new, fabulously forest-y lamp!


Ta-Daaaaa!


In many cases you might have a perfectly good lamp base available but need to freshen up the shade, or vice-versa. However for this project I gave both halves a work over in just a few easy steps!


So, grab yourself a lamp base, an old shade and a sprinkle of imagination and lets make us a some lamp magic!